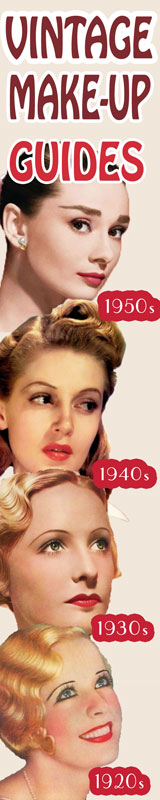
1920s Makeup: Updating Your Inner It! Girl

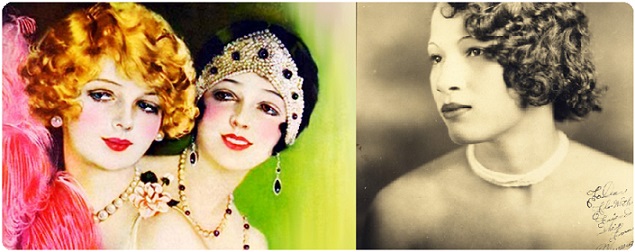
A 1920s makeup look has distinctive features. It’s the era that brought us the original ‘it girl’- Clara Bow…
It also brought on thin downward pointing eyebrows, open soft doe eyes, pronounced ‘rouge’on cheeks, and electrifying red lipstick drawn in a cupids bow shape…
This tutorial shows you how to work those aspects into your makeup. That is, without necessarily looking like you’re headed for a costume party. Unless you are. Then you should go all out!
If you do want to go the whole way with your 1920's look, I'm an affiliate of Glamour Daze , who have downloadable brilliant beauty guides for about $10 each.
These are original restored manuals from the 1920's that you can draw inspiration from.
I bought them thinking that all I'd get was an idea of the 1920's look. It was a pleasant surprise to find so much more helpful information than I'd bargained for.
You'll find hair, dress, and a great sense of 1920's thinking about an approach to beauty. This is classic advice that explains why women with the right knowledge have always been so fabulous...
What You'll Need...
Preferably cream eye shadow (1 color of your choice, 1 black, grey, or dark brown... )
Blending brush
Pencil eyeliner
Eyeliner brush(optional)
Mascara
Even Out and Perfect Your Skin Tone...
What you want is a clear, even, fresh and matte skin tone. Basically, the skin is one even color that will be finished off with powder. Start by making sure the skin is nice and clean and half the job is done.
What they didn’t have in the 1920s makeup arsenal was primer, and our trusted concealer. These two are going to help in limiting the amount of makeup you’ll need for coverage.
The primer fills in your pores and creates a smoother surface to apply the foundation. If you have an illuminating primer that will be even better. The light reflectors help to give you skin this healthy, happy, freshness...
Apply primer all over your face, making sure you don't rub it in. Rather just apply it the same way you would foundation. Use a foundation brush for the best effect.
The concealer gives you cover for any really problematic areas like spots and under eye circles. Just a little, goes a long way... Dab concealer on the problem areas, then blend it in light, feathery strokes.
Make sure your movements are light, because you're not rubbing into the skin, you're applying over it.
Then it’s time for foundation. You will start with the foundation best suited to your skin type, in a color that blends into your skin.
Our goal is a matte finish to the skin. Apply the foundation, and then set it with translucent/ appropriately colored powder.
Create Those 'Save Me' Eyebrows
The eyebrows of the 1920’s were a little on the thin side, high, drawn in, and downward facing on the ends. The look of a girl in need of a tall, dark, saviour... These are a bit droopy and unnatural though...
So what you can do is update the look by just trimming the brows in your usual way. That which best matches your other features. For someone with heavy, big features, a fuller brow is more beautiful and natural, while the reverse is true for those with more delicate features.
Whether they’re full or thin, you should shape them and fill them in for better definition.
Brush upwards, and then across the top line of the lashes like this…
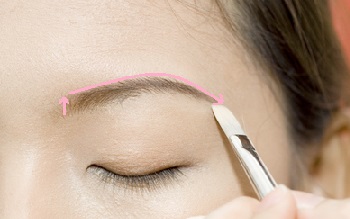
This will also make them seem thinner even when they're on the thicker side...
Enhance the pointy ends downwards ever so slightly. Do this by penciling them in and using a brow brush to blend.
Then brush the hairs beyond your arch downwards.
This gives you the 1920’s makeup effect without having to drastically and semi-permanently alter the brow.
Put some highlighter under the eyebrows or an eye shadow that is a few shades lighter than your skin. This will give your brows a bit of a lift.
Those Dark, Soft, Round Doe Eyes...
The eyes are nicely dark, while at the same time keeping soft. There wasn't an assortment of color eye shadows in the twenties. That's why you keep your eyes black and grey. They used black mascara pigment that was applied with a brush.
Basically, using what we use as just eye shadow today, as eyeliner. You can also do that to get the authentic, soft, but dark look.
Start with a medium toned, grey, or other rich dark color dead smack in the middle of your lid. Blend this out to the rest of the lid.
Why you do this is to concentrate the color on the middle of the lid. This gives a rounded effect. Also, blend the color out beyond your lid just a little. This is one we would see when your eyes are open...
Line the top lash line with black liner, because you can. Then only line the bottom waterline. Line the bottom lashes if you'd like, but either way, smudge the liner when you're done.
This defines the lash line with just a shadow. It gives you the effect of lining with eye shadow, but lasts longer.
Curl both the lashes, and then apply mascara. Place more coats of mascara on the middle lashes for more of that rounded effect.
Rouge On The Cheeks For More Youthful Looking Skin...
Now it’s time for the all important ‘rouge’…
An integral part of your 1920s makeup routine.
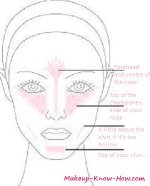
Before you apply blush, please brush up on how to choose and apply blush according to your face shape.
Do this using this blush guide.
Choose a blush color that complements your skin.
Colors range from soft, light, pinks and peaches for the palest amongst us to deeper, richer colors for darker skin.
Apply the blush in the same way that you would blend color. Feather light strokes, and dabs.
Once you have given yourself healthy blushing cheeks, move on to the lips.
Get Lippy With Your 1920s Makeup
Choose a red lipstick that complements your lips, and your coloring.
If you were to take everything from the 20’s, that would be selfish! So we are going to leave the obviously drawn on lips in the 1920s makeup look books...
What we will take though, is the subtle creation of the cupids bow lips. How do we do this? Apply foundation over the lip area to create a seamless transition.
Use the lip liner to trace the outline of your lips, and a cupid’s bow where the top lip dips. Start at the middle of the dip at the cupids bow.
Trace the lining of your lip outwards. Then do the other side, and the bottom lip. You can fill in with the lip liner to make the lipstick last longer.
Now fill in with your fiery lipstick! Concentrate most of the color in the middle of the lip, then blend it outwards. This emphasizes the cupids bow shape. It gives you that pout that sexy's up the lips in a 1920s makeup way....
Blot the lipstick between four or five applications to make it stay longer. Also ensure that it's not going to stain your teeth. How? Use a tissue.
Fold it up and place it between your lips after application. Any extra will go onto it, and stay away from your pearly whites!
Today we have the luxuries that 1920s makeup look epitomized.
Freedom and the option to be whomever and whatever you are… So go ahead and live up to your aspirations flapper lady ;)…
Makeup Know How Home › Vintage Makeup › 1920s Makeup: The Flapper LookDidn't find what you were looking for? Search this site...
Sign up for continuously putting your best face forward with our monthly e-zine...:)
Recent Articles
-
Eye Make Up Tips For Your Eye Color
Mar 13, 15 05:19 PM
Eye Make Up Tips: How to do eye makeup that works with your color profile! -
Contouring Makeup and Highlighting Tips For Any Face Shape
Mar 13, 15 05:06 PM
 Use contouring makeup to really sculpt your facial features!
 -
Concerns About Lead In Lipstick?
Dec 30, 14 11:42 PM
Lead in lipstick is a great concern for makeup lovers. Here's how to go about deciding on the safety of lipstick…